OUTDOOR SHOWER - jungle house - a loose guide about how we did it!
Share
From the moment we put an offer in on jungle house we knew there needed to be an outdoor shower. While, yes, we are just a mile from the river & a short skip to the beach, the dirt is very sandy & the boys would leave every time we viewed it looking like they just got off a three-day-shift at a coal mine.

With the goal of getting into the house before our third would be born here, the shower wasn't super high on our to-do's with the, as we call it, stephen king worthy bathroom & asylum blue everything else pulling our focus.
But here we are, it will be a year since we closed next month, & we completely renovated the inside (obviously with other projects always in mind), have quite a few chickens, & are rather settled in - so it's time to start chipping away at some outside work!

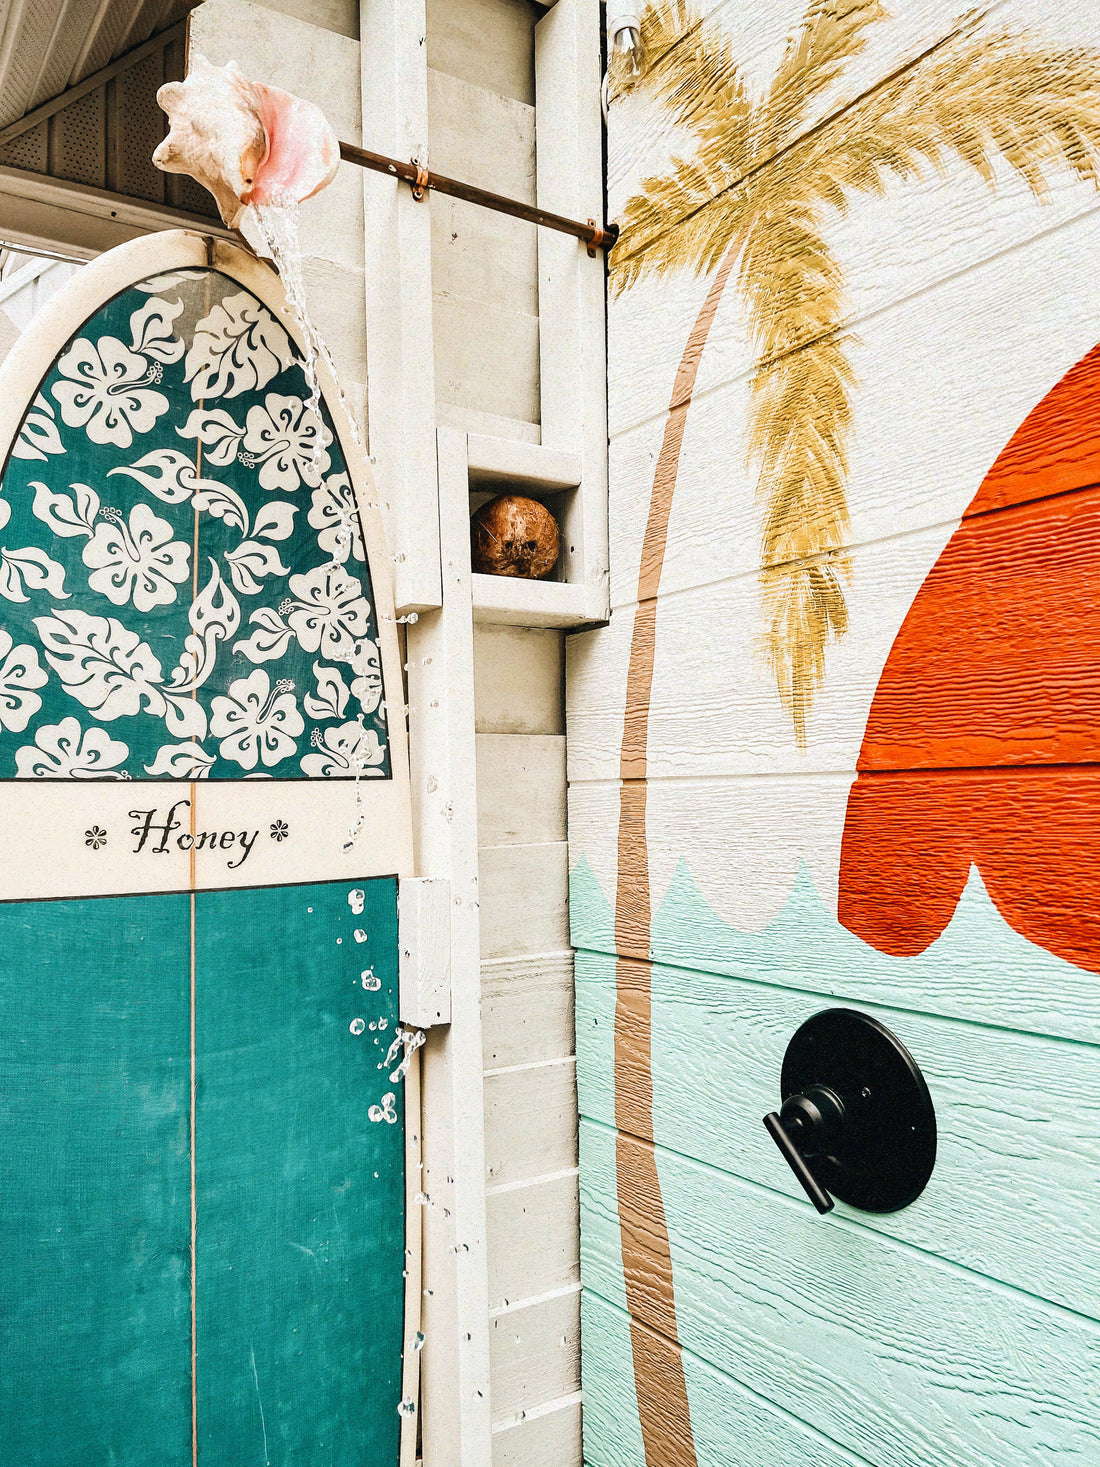
I came up with a super rough vision board. The main thing i wanted to emphasize to was that we HAD to have a conch shell as the shower head like I have had saved to my "dream home" pinterest board for years. Mind you, we have never touched anything plumbing related, so there wasn't much "we've got this!" about that detail. However, if you know me, you know that if I have an image in my noggin, we are making it work!
We decided on a few things - using more of the recycled fence panels that our neighbor gave us (also used for the chicken coop Matthew built!), incorporating a surf board (thanks to fb marketplace), needing a bench, & doing a rock bed underneath for drainage. From there we made decisions as we faced it.

I want to preface the work portion of this by saying, Matthew did it all (besides the chunk of floorboards I screwed in) & I came in with the paint & finishing touches.
He started by digging a rectangle out, inserting the 4x4s for the frame & secured them with cinder blocks & cement. Next was filling that area with a large gravel & getting the "walls" put up. Then we used a few boards of trex across the cinders that we would screw the floorboards into! We weren't thrilled with using treated wood, but in honor of ballin on a budget we stuck with the fence panels but splurged on cypress for the floors. Our friend (Buffalo Bob, our go to guy for any bigger project) who helped Matthew had a slab of it in his shop & gave it to us for the bench!
Because the shower is between two windows, the sides are built up a bit for added privacy from anyone inside.

Once we had most of the build done, I realized I didn't want to look at the side of the house. We (I, haha) decided I would be painting the inside of the shower to avoid our relaxation in the future being pierced with the chemical smell of treated wood & clean up the overall appearance. The brick & blue siding just didn't ~go~ with the vibe. Matthew hung some T1-11 which of course led to the mural.

I did a rough sketch of a few mural ideas, but waited until I was in Home Depot to finalize because ya girl is most inspired by a good paint swatch wall! Above are the colors we used! We always aim for one coats & absolutely always get behr marquee. In hopes of making it an easier job I strayed from my favorite white, "polished pearl," & went with fresh linen because it's a one coat! All we needed for the other colors was the sample sizes. We are also now feeling tempted to paint the outside of the house "fish pond."

I often get asked how we do stuff like this with three small children, usually I have the smallest tied to or playing next to me while the older groms play outside. Thankfully this time around my parents are in town so they came & distracted them from the wet paint. When all else fails, these are the times we utilize screentime & let them watch "If You Give a Mouse a Cookie" or "Guess How Much I Love You" so we can knock it out. Our secret to success with screens is using them as a tool & not giving them the option when they want it.

I eventually finished painting with the help of my mom. It always feels like every time I turn around there's another section I missed!
Then it was time for all of the "trimming" for the plumbing. Matthew had already run the water lines (hot & cold) under the house. Buffalo Bob & him ran the rest of the pvc piping outside before officially hanging the wall. We used copper for the part that would be exposed for the shower head. The same corded shower head & faucet we have on our original clawfoot tub inside was what we ordered (in black) for the wall so we could have an easy spot for foot rinsing or hosing down the kiddos!
I spent the next afternoon painting the mural while we waited for the cement glue to dry on the elbow fitment in the conch (because it was a horn it already had a hole).

Finally, Matthew & Buffalo Bob soldered the conch shower head & it worked! I came in with some finishing touches - plants, body wash, boat cleats to hang towels or wet swimmies, etc! Matthew ran an extension under the house & installed a remote switch so we could have some lights above for evening rinses.

There she is! We could not be more thrilled with the outcome & are using it for our everyday showers, because how could we not!? Every time I get out I tell Matthew that this doesn't even feel like real life. It's a truly magical little escape from the world :')
you can take a peek at it in action over on instagram!
https://www.instagram.com/reel/C21IKv3gFFV/?utm_source=ig_web_copy_link&igsh=MzRlODBiNWFlZA==


